
TL;DR
GPT Image 2 is a browser-based AI image generator that runs two modes — text-to-image and image-to-image — at a flat 12 credits per image. This complete guide on how to use GPT Image 2 walks you through sign-up, your first generation, uploading a reference photo for edits, and the prompt patterns that actually work in 2026. Try GPT Image 2 free →
Prerequisites: What You Need Before You Start
You do not need a powerful GPU, a Photoshop license, or any prior AI experience to follow this guide. GPT Image 2 runs entirely in the browser. What you do need is short and practical:
- A modern browser. Chrome, Edge, Safari, Firefox, or Arc — any current version works. Hardware acceleration helps the preview feel snappy, but it is not required for generation itself. Generation happens on our servers.
- An email address. Sign-up uses a standard email + password flow, with Google one-click as an alternative. Work emails and Gmail both work; disposable mail domains are blocked.
- A small credit balance. Every generation costs 12 credits regardless of prompt length, aspect ratio, or whether you are doing text-to-image or image-to-image. New accounts start with free trial credits so you can produce at least a handful of images before you ever see a paywall.
- A reference photo (optional). If you plan to use image-to-image, have one or two source photos ready in JPG, PNG, or WebP format. Under 10 MB each is a safe ceiling. Square or portrait crops give you the most predictable results.
- A rough idea, not a finished prompt. Beginners waste time trying to write the "perfect" prompt on the first try. You don't need one. The first five minutes of this tutorial are about running a simple prompt, seeing the output, and iterating.
As of April 2026, there is no required download, no API key setup, and no waitlist. You open the homepage, sign in, and generate.
One thing worth knowing up front: this guide on how to use GPT Image 2 is written for people who want to use the tool well, not just click it once. The mechanical steps take about two minutes. The judgment — what to type, how to read your output, when to iterate versus when to move on — takes longer, and that is most of what the sections below actually teach. If you are impatient, skip to Method 1, generate a few images, then come back for the prompt engineering and common-mistakes sections when you hit your first frustrating result. You will hit one. Everyone does.
Method 1: Text-to-Image — Your First Generation from Scratch
Text-to-image is the mode you probably came here for. You type a description, press a button, and the model returns a finished image. Here is exactly how to do it on GPT Image 2, step by step.
Step 1: Open the Generator and Sign In
Go to the GPT Image 2 homepage. The generator panel sits above the fold on desktop and is the first full section on mobile. If you are not signed in, you will see a "Sign in to generate" prompt. Click it, choose email or Google, and confirm. The whole flow takes under a minute.
Once signed in, your credit balance appears in the top-right of the header. Confirm you have at least 12 credits. New accounts receive trial credits automatically; you do not need to enter a card to run the first example in this guide.
A quick note on how credits show up. The header balance is authoritative — it reflects anything you have already spent this session, including failed generations that were automatically refunded. If a generation fails because of a server hiccup (rare, but it happens at peak hours), the 12 credits roll back and the balance updates. You do not need to contact support for a refund on a failed job. If you ever see a charge against a generation that did not finish, that is the one case worth reaching out about.
Step 2: Select the Text-to-Image Tab
The generator has two tabs at the top: Text to Image and Image to Image. For this first run, leave it on the default Text to Image. The prompt input sits directly below the tab bar with a placeholder that reads something like "Describe the image you want to create…".
You do not need to pick a model manually. GPT Image 2 uses KIE's gpt-image-2-text-to-image model behind the scenes for this mode. There is no quality tier, no aspect-ratio dropdown, and no resolution selector — the product is deliberately simple. One model, one price.
If you come from tools like Midjourney, Stable Diffusion WebUI, or ComfyUI, this minimalism can feel bare at first. There is no CFG scale, no sampler selector, no seed input in the UI. That is by design. On those tools, most users fiddle with dials for 20 minutes and end up back at the defaults. Here, the single control is the prompt. You will be surprised how far a well-structured prompt can take you once the dials stop being a distraction.
Step 3: Write a First, Intentionally Simple Prompt
Beginners often try to cram every adjective they know into the first prompt. Resist that urge. Start with a short, concrete description so you can see what the model does without your interference. Here is the prompt I used when I first tested the tool as part of preparing this guide:
A golden retriever puppy sitting in a sunlit field of wildflowers, shallow depth of field, warm afternoon light.Paste it into the input and click Generate. The button shows a progress indicator while the request runs. Most prompts return a result in roughly 20 to 40 seconds, though peak hours can add a little overhead.
Step 4: Review the Output Honestly
When I entered the puppy prompt, the first output had a warm tone, sharp eyes, and believable blur on the background — but the paws were slightly mushy, which is a classic weak spot for image models. That is fine. You are not grading the output on a pass/fail basis. You are learning what the model gives you for free so you know what to nudge next.
Three things to check on your first result:
- Subject fidelity. Did the model render the subject you asked for, or did it drift (e.g., a Labrador instead of a golden retriever)?
- Lighting direction. Does the light match what you described ("warm afternoon light" should look soft and directional, not overhead noon light)?
- Composition. Is the subject framed the way you imagined, or centered in an awkward way?
If any of those three misses, you have a reason to edit the prompt in Step 5 rather than re-rolling blindly.
Step 5: Write an Optimized Prompt
Here is an upgrade of the same scene. Same subject, same lighting idea — but with the structure that works well on GPT Image 2.
A 3-month-old golden retriever puppy with fluffy fur and floppy ears, sitting upright in a meadow of wild daisies
and lavender. Warm late-afternoon sunlight streams from the left, casting long gentle shadows and creating a soft
golden rim light on the fur. Shallow depth of field, background softly blurred with bokeh. Shot on an 85mm lens,
eye level with the puppy. Photorealistic, high detail, natural colors.
Four things changed:
- Concrete detail on the subject ("3-month-old", "fluffy fur", "floppy ears") anchors the model.
- Direction of light is specified ("from the left", "rim light on the fur") instead of just "warm".
- Camera vocabulary ("85mm lens", "eye level") gives the model a concrete composition template.
- Quality modifier at the end ("photorealistic, high detail, natural colors") is short and stays out of the way.
Click Generate again. The second result should land closer to the picture in your head. If it does not, do not rewrite the whole prompt — change one variable at a time, regenerate, and compare.
A useful mental model: a prompt has four "slots" — subject, action/pose, environment, and style. When you revise, identify which slot produced the mismatch, rewrite that slot only, and leave the others alone. In the puppy example above, if the dog breed is wrong, the subject slot is the one to edit. If the lighting is off, the environment slot. If the image looks like a cartoon when you wanted a photo, the style slot. This discipline saves a lot of credits on your second hundred generations.
Step 6: Save, Download, or Iterate
Once an output lands, you can download it with the button beneath the preview. Every generation is stored in your account history so you can revisit earlier versions, copy their prompts, and iterate. This history is also where you will pull the source image from in Method 2 if you want to keep editing the same character.
The loop you just completed — open, prompt, review, refine, regenerate — is the entire text-to-image workflow. Everything else in this guide is about doing that loop faster and with fewer wasted credits.
One habit that pays off if you plan to use GPT Image 2 regularly: keep a simple text file of prompts that worked. Not prompt templates, not a "cheat sheet" — just a log. Every time a generation lands the way you wanted, paste the prompt and a one-line note about the result. Six months in, you will have a personal prompt library that reflects your own aesthetic, which is more useful than any prompt library you can download online.
Method 2: Image-to-Image — Edit and Transform an Existing Photo
Image-to-image (sometimes called "i2i" or "editing") starts from a source picture instead of a blank canvas. The model keeps what you want from the source and rewrites the rest according to your prompt. This is the right mode for edits like "same person, different outfit", "same product, different background", or "same composition, different art style".
Step 1: Switch to the Image-to-Image Tab
Back on the homepage generator, click the Image to Image tab. The input area changes: you now see a file upload zone above the prompt box. The prompt field is still there, and it still accepts up to 20,000 characters, but now it works together with the uploaded image.
Behind the scenes this mode uses gpt-image-2-image-to-image. The pricing is identical — 12 credits per image — and there is no separate "strength" slider. You control how much the image changes through your prompt wording, which is actually simpler than the ten dials most tools expose.
If you have used InPainting masks in other tools, expect a different mental model here. GPT Image 2 does not ask you to draw a mask over the area you want to change. It reads the whole image and the whole prompt together, and rewrites whatever your prompt implies should change. That sounds looser than masking — and in absolute terms it is — but for 80% of real edits ("change the background", "swap the outfit", "make it night instead of day"), prompt-only editing is both faster to set up and less fiddly to control.
Step 2: Upload a Source Image
Drag a JPG, PNG, or WebP file onto the upload zone, or click the zone to browse. I recommend starting with a clean, well-lit photo on your first try. Reference photos with heavy motion blur, low light, or cluttered backgrounds give the model more to reinterpret, which makes the before/after harder to read.
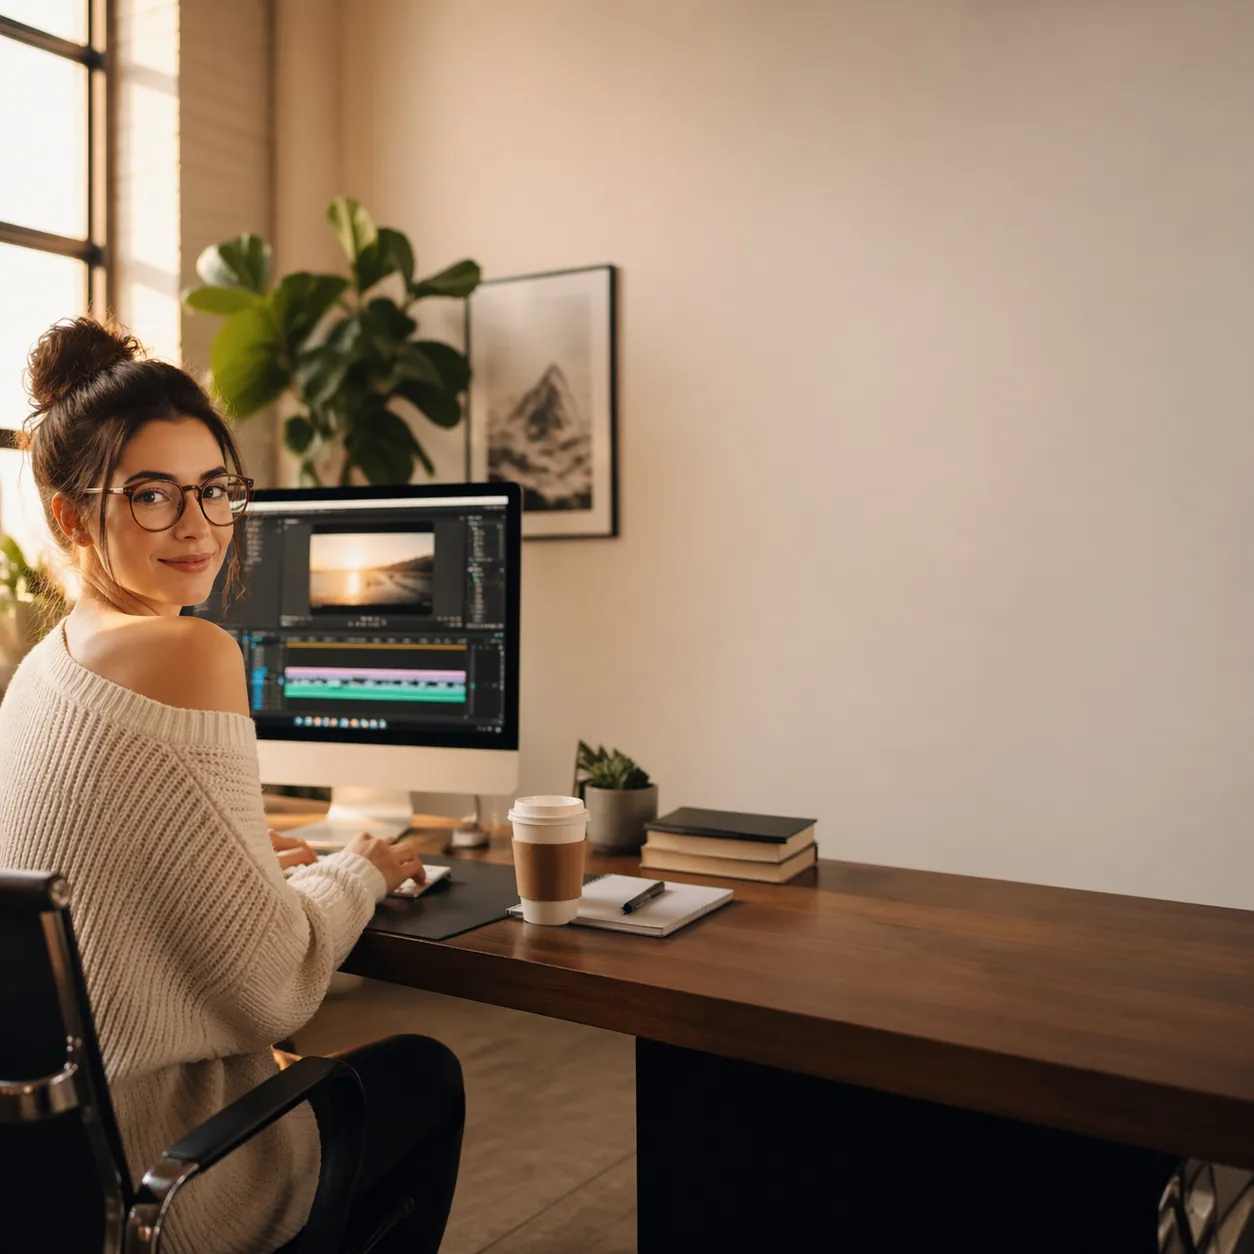
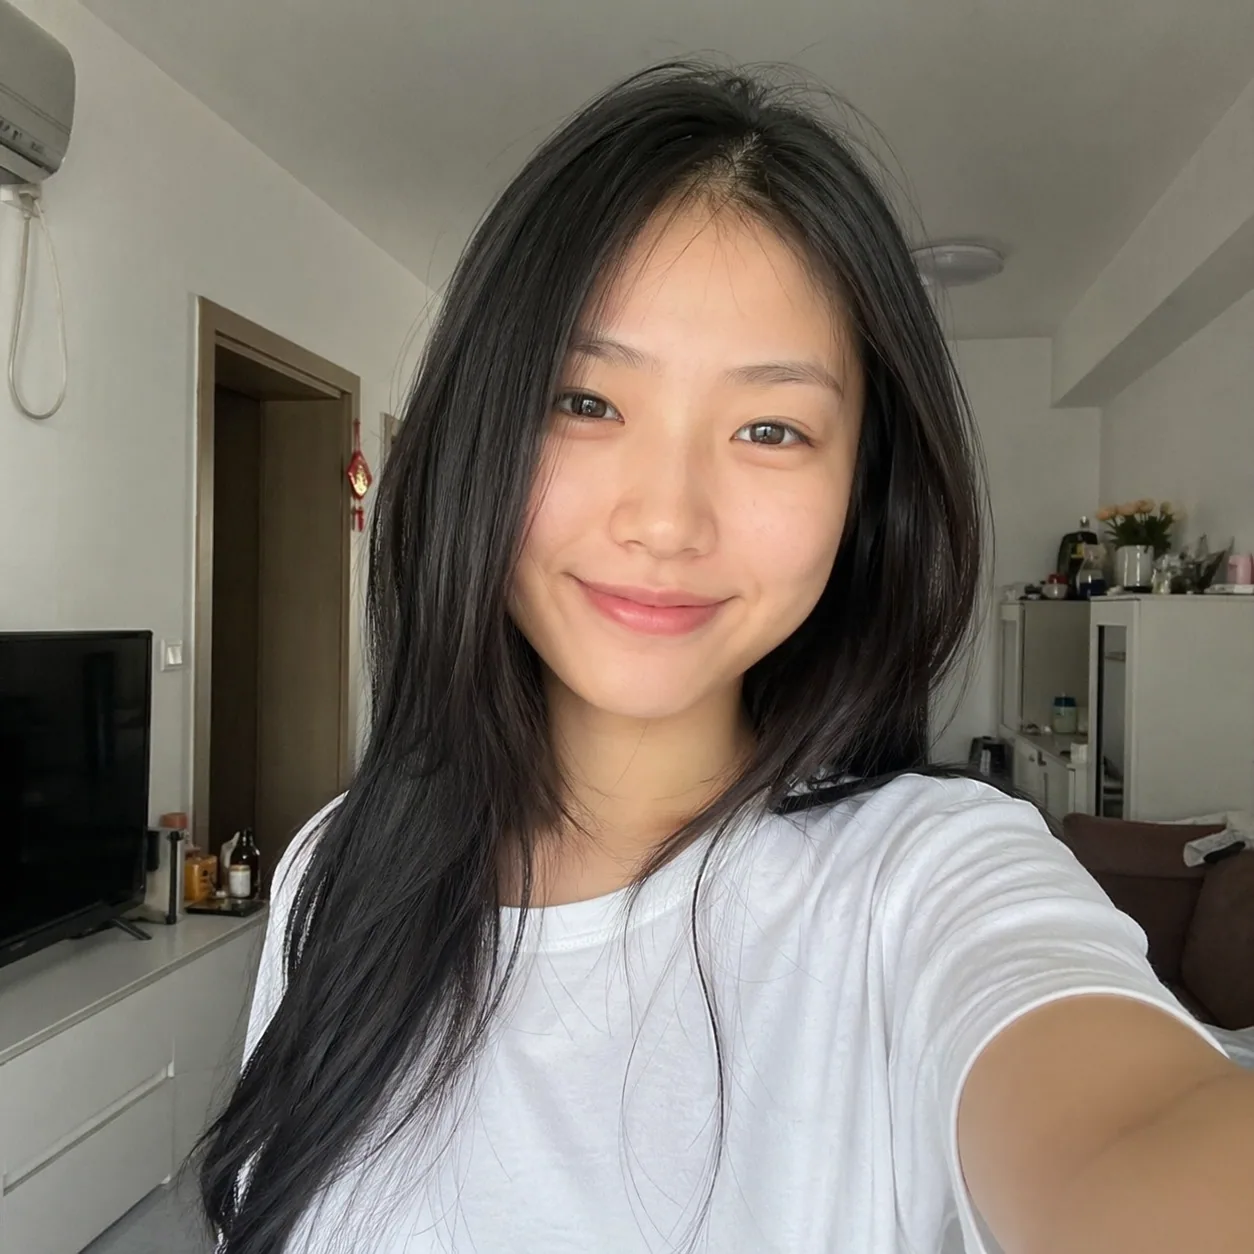
For this walkthrough, imagine a casual indoor selfie — the kind of photo someone would upload to try an AI app for the first time.
Step 3: Decide — Edit or Transform?
Before you write the prompt, decide what kind of change you want. Image-to-image covers two distinct intents, and the right prompt looks different for each.
- Edit: keep the photo mostly the same, change one thing. "Change the shirt to navy blue." "Remove the coffee cup on the desk." "Replace the background with a bookshelf."
- Transform: keep the subject's identity, change the whole scene. "Same person, now dressed in a traditional hanfu standing on a moonlit palace terrace." "Same product photo, now on a marble surface with studio lighting."
The more the prompt describes the new scene in full, the more the model will rewrite. If you only mention one attribute, it tends to preserve the rest. That is your lever for controlling change magnitude without a slider.
A concrete example of the difference: "change the shirt to navy blue" leaves the face, hair, pose, background, and lighting untouched — a narrow edit. "She is now wearing a tailored navy suit, standing in a glass-walled corporate office at golden hour" is a transform — suit, environment, and lighting all change together, and the model only preserves the face and body silhouette. Both prompts are one sentence. The magnitude of change is set by how much of the scene you bother to describe.
Step 4: Write a Prompt That Points the Model at What to Keep
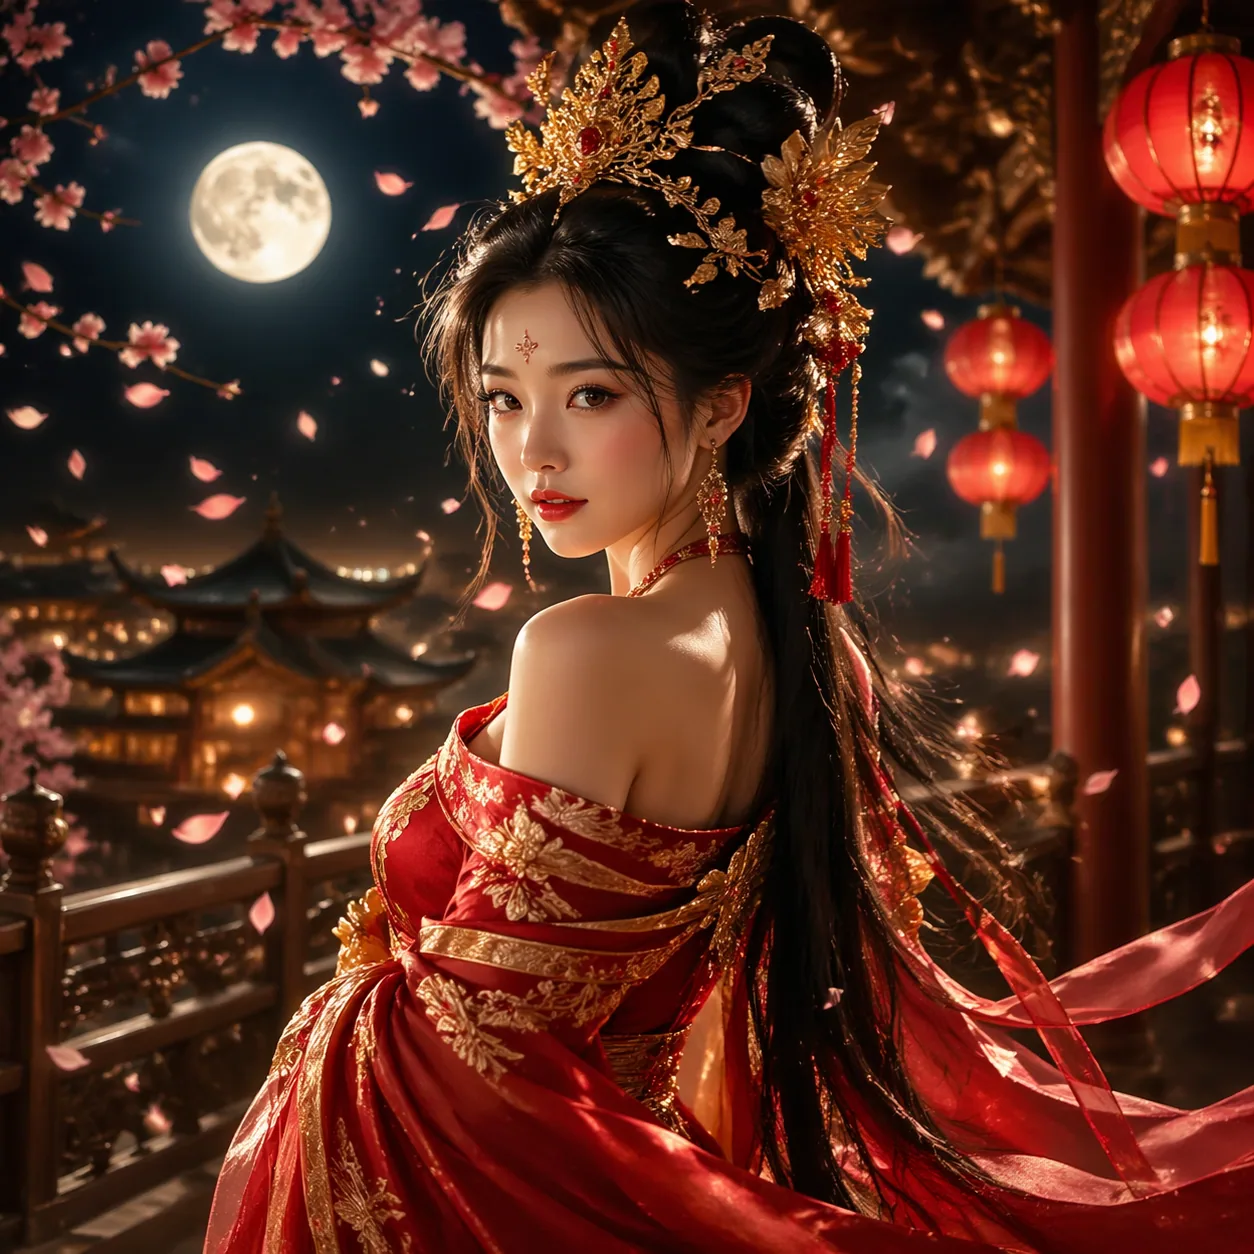
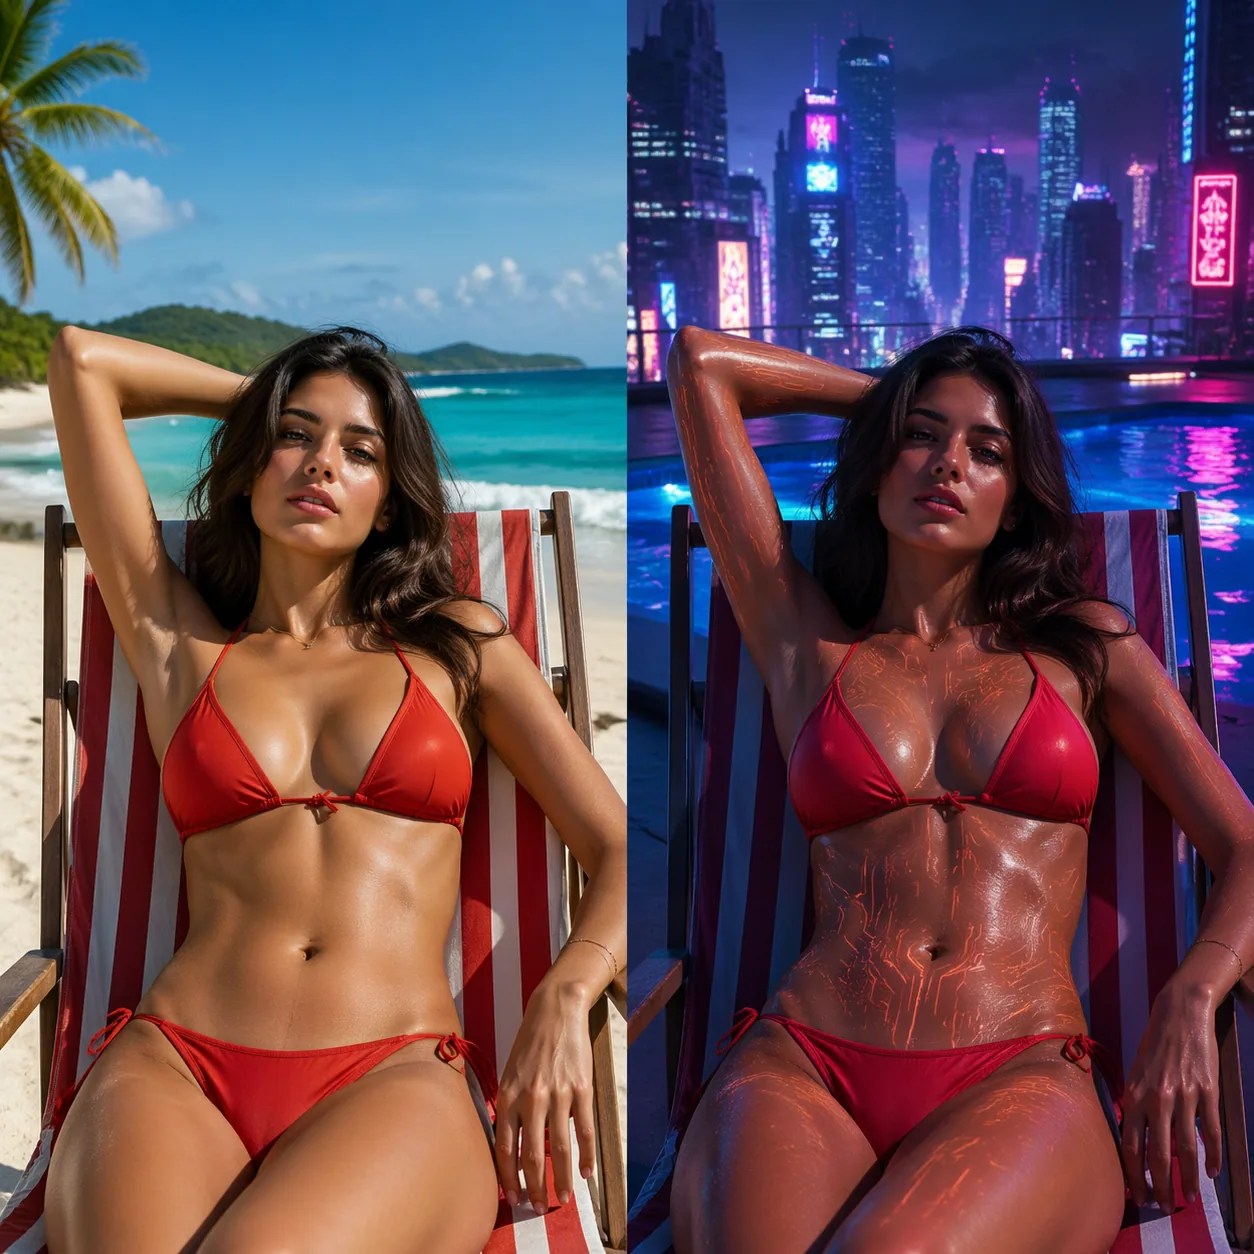
Here is the transform-style prompt I used on the source photo above:
Same woman — identical facial features and hair. Transform the scene: she now wears an elaborate crimson-and-gold
hanfu with intricate embroidery and a jeweled phoenix hairpin. She stands on a moonlit palace terrace, red
lanterns glowing softly in the background, cherry blossom petals drifting in the air. Warm lantern light from the
right, cool moonlight fill from the left. Cinematic shallow depth of field, elegant composition, 4K photorealistic.
Two things I made explicit:
- "Same woman — identical facial features and hair." This one sentence does most of the identity-preservation work. Without it, the model is free to drift.
- Full scene description for the transformation. Wardrobe, location, props, lighting directions. The model is rebuilding the entire environment, so it needs a full set of instructions, not just a single tag.
Step 5: Generate and Compare the Before/After
Click Generate and wait. When I ran this prompt during testing, the result kept the subject's face and hair silhouette clearly recognizable while rebuilding everything else around her.
Compare the before and after side by side. If the face drifted too far, tighten the "same person" clause in your prompt (e.g., add "preserve exact face shape, same eyes, same nose, same lip shape"). If the scene did not change enough, add more environment detail. That is the dial.
Step 6: Chain Edits Without Leaving the Page
One of the quiet strengths of image-to-image is that the output you just made is a valid source for the next edit. Click to use the result as the new input, then write a fresh prompt ("same scene, now at dawn instead of night" or "same pose, now holding a folded fan"). Small, chained edits almost always produce cleaner final images than one giant prompt that tries to do everything at once.
This chaining pattern is the single biggest workflow tip in this guide. The common failure mode for beginners is writing one 300-word prompt that describes outfit + pose + location + lighting + mood + camera + style, regenerating eight times, and never landing the shot. The professional pattern is: nail the character in one pass, then nail the outfit in a second pass using the first output as input, then nail the environment in a third pass, then nail the lighting in a fourth pass. Each step costs 12 credits. A four-step chain costs 48 credits total and, in my experience, produces a finished image that would have taken 10+ rerolls of a one-shot prompt.
Prompt Engineering Tips for How to Use GPT Image 2 Well
You now have the full mechanical workflow for how to use GPT Image 2. The difference between a first-day user and someone who ships a portfolio from GPT Image 2 is not a secret prompt — it is knowing which levers do the heavy lifting. These are the seven that have the highest return on effort, based on the patterns I see working consistently in production.
Tip 1: Put the Subject First, Quality Modifiers Last
Start your prompt with who or what the image is about. Put render quality words (photorealistic, cinematic, 4K, high detail) at the end. Models read the prompt front to back, and the subject at the front gets the most weight. Burying it after seven quality tags dilutes it.
Weaker: Hyperrealistic 4K masterpiece cinematic detailed ultra-HD photo of a cat sitting on a windowsill
Stronger: A black-and-white tuxedo cat sitting on a wooden windowsill, watching a rainy city street outside. Soft diffused light from the window, shallow depth of field. Photorealistic, cinematic.
Tip 2: Specify the Light Direction, Not Just the Mood
"Beautiful lighting" tells the model almost nothing. "Warm sunset light from the left, long shadows falling to the right" tells it where every shadow goes. Directional, named light sources ("window light", "rim light", "softbox from above", "neon fill from behind") are one of the biggest quality jumps you can unlock with three extra words.
Tip 3: Use a Camera Template for Realism
If you want photoreal output, steal the vocabulary of photography. A lens focal length (35mm, 50mm, 85mm, 135mm), an aperture hint (shallow depth of field, deep focus), and a camera position (eye level, low angle, overhead) together give the model a concrete composition. The Wikipedia article on camera lenses is a good 10-minute read if you want to pick focal lengths deliberately.
Tip 4: Reference Styles by Medium, Not by Artist Name
Prompts like "In the style of <famous artist>" are fragile and raise attribution questions. Describe the visual medium instead: oil painting with visible brushwork, pencil sketch with cross-hatching, vintage Kodachrome film look with grain, clean vector illustration with flat colors. This gives the model aesthetic direction without leaning on a specific person's body of work.
Tip 5: Guide Negative Space Through Positive Phrasing
GPT Image 2 does not expose a separate "negative prompt" field. You steer the model away from unwanted elements by describing what you do want, clearly. Instead of no people, no text, no clutter, write an empty room with clean walls, minimalist composition, a single plant in the corner. Positive description is more reliable than negation.
Tip 6: Lock Identity Before You Rewrite a Scene (Image-to-Image)
When you transform a photo and want the face to stay the same, the opening sentence of the prompt does most of the work. A phrase like Same person — preserve facial features, hair color, and skin tone at the top of the prompt is worth more than any clever scene description later. If you need tighter identity, add same eye shape, same nose, same lips. Be explicit.
Tip 7: Iterate in Small Steps, Not Rewrites
Change one variable per generation. If the pose is right but the outfit is wrong, rewrite only the outfit clause. If the lighting is wrong but everything else works, rewrite only the lighting clause. This gives you a controlled feedback loop where you actually learn which word did what. Total rewrites between generations destroy that signal and burn credits.
Tip 8: Write the Prompt in the Order the Model Should Care
Front-load the important slots: subject, action, environment, then style. If you write "in the style of oil painting, there is a woman in a red dress walking down a cobblestone street at dusk", you are telling the model "this is primarily an oil painting" and secondarily everything else. Flip the order — "A woman in a red dress walks down a cobblestone street at dusk, rendered as an oil painting" — and the model hears subject first, medium last. Both prompts contain the same information; the second one ships noticeably better results most of the time.
Tip 9: Use the Words That Photographers and Directors Actually Use
Terms like "Dutch angle", "rack focus", "golden hour", "overcast daylight", "softbox", "gobo shadow", "hero shot", "two-shot", and "negative space" carry real meaning in photography and film, and the model has seen those words attached to many example images during training. Vague feel-words ("vibey", "dreamy", "epic") are much weaker signals. If you want specific cinematic looks, the Wikipedia article on shot composition is a good 15-minute glossary to steal vocabulary from.
Common Mistakes and How to Fix Them
No tutorial is honest without this section. I have made every one of these mistakes. You probably will too — but at least you will recognize them faster.
Mistake 1: Writing one 400-word prompt and expecting a final image. Image models are better at narrow prompts you iterate than at sprawling prompts you try to nail on the first shot. The 20,000-character limit is not a goal. Most of my best outputs from GPT Image 2 come from prompts between 40 and 120 words.
Mistake 2: Re-rolling without changing the prompt. If you press Generate twice on the same prompt and get two "almost" results, the third press will also be almost. Randomness explores a small neighborhood. If the neighborhood is wrong, no number of re-rolls will save you — the prompt needs to change.
Mistake 3: Contradicting yourself inside the prompt. Asking for "soft dreamy watercolor" and "ultra-sharp photorealistic 4K" in the same prompt is a contradiction. The model will pick one, or, worse, average them. Decide what you want before you write.
Mistake 4: Expecting text in images to be perfect. As of April 2026, AI image models are still imperfect at rendering clean text, especially long phrases or non-Latin scripts. Short labels on signs often work. Paragraph-length text rarely does. If text is central to your image, composite it in afterward with any basic image editor.
Mistake 5: Uploading a blurry source to image-to-image. The model treats the source as its baseline for detail. A soft, low-light phone photo gives soft, low-quality output, no matter how sharp your prompt says the result should be. Start with a clear source whenever possible.
Mistake 6: Forgetting that hands are hard. Hands remain the single most common artifact in image generation. If a hand is central to the composition, accept that you will regenerate more than once. If it is not central, frame the shot so hands are partially out of view or relaxed at the subject's side.
Mistake 7: Ignoring aspect ratio at the upload stage. For image-to-image, the output tends to follow the shape of your upload. If you want a wide landscape but upload a portrait selfie, the model is fighting you. Crop the upload to the intended aspect before generating.
Mistake 8: Treating the first decent result as the final result. New users generate one image that is "good enough", download it, and stop. Professional users use the first good result as the new baseline and push for a second pass that is clearly better. The gap between "good enough" and "portfolio" is rarely found on the first generation; it is found on the third, using the first as a reference.
Mistake 9: Forgetting that the model has no memory between generations. Unless you use image-to-image with your previous output as the source, each generation is completely fresh. If you produced a great character on Tuesday and want another image of her on Wednesday, you cannot just say "the same character as last time". Either keep the exact original prompt handy, or — better — chain from the previous image.
How GPT Image 2 Works Under the Hood (Briefly)
Before we wrap the tutorial, a short technical aside on how to use GPT Image 2 with realistic expectations about the engine underneath.
You do not need this to use the product, but it helps with expectations. GPT Image 2 is a thin, focused UI on top of KIE's gpt-image-2-text-to-image and gpt-image-2-image-to-image models. Those are diffusion-family models tuned for instruction-following and high-fidelity photoreal output. Every generation request is authenticated, billed (12 credits), queued, and returned as a downloadable image URL.
The reason the interface has so few dials — no tiers, no resolution menu, no strength slider — is deliberate. The KIE API does not expose those controls for this model, and adding fake sliders on top would mislead users. Everything the model can do, it does through the prompt. That is a feature, not a limitation, once you get used to it. If you want to go deeper on how diffusion models turn prompts into pixels, the Wikipedia entry on diffusion models is a solid starting point, and OpenAI's image generation research notes give broader context on where the field is heading.
Where GPT Image 2 Falls Short
A tutorial that only sells you on the upside is a pitch, not a tutorial. Here is where GPT Image 2 — and by extension, any current image model — will make your life harder.
- Exact brand reproduction. Logos, trademarked characters, and product packaging are not reliably reproduced. Generate the composition, composite the real logo on top.
- Strict reference matching. If you need a generated character to look identical across 50 shots (comic panels, for example), image-to-image carries identity further than text-to-image, but neither is frame-accurate like a trained LoRA or a 3D rig.
- Anatomy under stress. Fingers, feet, teeth, ears, and overlapping limbs are the weakest points. The closer the camera, the more obvious the errors.
- Perfect typography. Already mentioned above — still true.
Knowing these limits up front means you stop asking the tool to do the things it cannot do, and start chaining it with tools that can. The best AI image workflows are not "one model does everything". They are "GPT Image 2 for the 80% that matters, a basic editor for the 20% that needs hand finishing".
Two more honest caveats worth stating. First, output variability is a feature of any diffusion-family model — identical prompts produce different results run to run. That is useful when you want variety and annoying when you want consistency. Embrace it for exploration, and lean on image-to-image chaining when you need to hold a look across multiple images. Second, the model reflects patterns in its training data, which means certain scenes, cultural settings, or niche subject matter may render less accurately than mainstream ones. If your target scene is unusual, expect to iterate more than you would for a generic portrait or landscape.
Quick Reference: The Full Workflow on One Page
If you want the shortest possible version to pin next to your monitor:
- Open the GPT Image 2 home page and sign in.
- Confirm you have at least 12 credits.
- Pick your tab — Text to Image or Image to Image.
- If i2i, upload a clean source photo.
- Start with a short, concrete prompt. Subject first, quality last.
- Generate. Review honestly against three checks: subject, light, composition.
- Change one variable, regenerate, compare.
- Repeat steps 6–7 until the output is right.
- Download.
That is it. Every shortcut, trick, and power-user habit in this guide is a variation on those nine steps.
One more practical habit worth building early: write your prompt in a plain text editor first, not directly in the generator input. A separate editor lets you keep a running version history, rearrange clauses without losing your place, and reuse opening lines like "Same person — preserve facial features, hair color, and skin tone" across many image-to-image runs without retyping them. When a prompt lands, copy the final version back to your personal prompt log. This tiny friction step keeps your best work from disappearing into browser history the first time you refresh the page.
Frequently Asked Questions
How much does GPT Image 2 cost per image?
Every generation costs a flat 12 credits per image, whether you are running text-to-image or image-to-image. There are no extra fees for longer prompts, larger outputs, or higher "quality" tiers — those dials do not exist. Credits are bundled in the pricing plans on the site, and new accounts receive trial credits to start.
Do I need to install anything to use GPT Image 2?
No. Everything runs in the browser. There is no desktop app, no plugin, no API key setup required to use the web UI. You only need a modern browser and an email address.
What is the maximum prompt length?
The prompt field accepts up to 20,000 characters in both text-to-image and image-to-image modes. That said, most effective prompts land between 40 and 200 words. Extremely long prompts tend to dilute the signal and add contradictions; short, structured prompts usually win.
Can I upload multiple reference images?
The image-to-image mode works with a single source image. If you need to combine several references (e.g., "this person, but with this outfit style"), you can chain generations: produce one output, then use that output as the next source with a fresh prompt. Chained edits often produce cleaner results than a single complex prompt.
Does GPT Image 2 support specific aspect ratios or resolutions?
The current product pricing is flat and the KIE API does not expose a user-selectable aspect ratio or resolution dial. For image-to-image, the output generally follows the shape of your uploaded source — so if you need a specific aspect ratio, crop your upload first.
Can I use the generated images commercially?
Output rights follow the terms of service linked from the site footer. Read those for the authoritative answer. In practice, as of 2026, most users generate for marketing creative, social content, prototyping, and personal work. Always check the current terms before using an image in a product that earns revenue.
What is the best way to learn how to use GPT Image 2 quickly?
Spend your first 12 to 20 generations on simple text-to-image prompts to calibrate what the model does at its defaults, then move to image-to-image with a clean source photo. Follow the nine-step quick reference above. Most users feel comfortable with the tool after roughly an hour of deliberate practice.
How do I keep a character consistent across multiple images?
Use image-to-image and start your prompt with a clear identity-preservation clause ("Same person — preserve facial features, hair color, and skin tone"). Then feed each output back as the source for the next image with a new scene description. This is not as tight as a dedicated character LoRA, but it is dramatically better than re-running text-to-image from scratch each time.
Why did my result look nothing like my prompt?
Three likely causes. One: the prompt put quality modifiers first and buried the subject — rewrite with the subject at the start. Two: the prompt contradicted itself (e.g., "watercolor" plus "photorealistic") — pick one medium. Three: the prompt described a mood ("beautiful", "amazing") without concrete nouns — rewrite with specific objects, light directions, and camera vocabulary.
Ready to Start?
You now have the full workflow, the prompt patterns, the pitfalls, and the quick reference card. The only thing left is to open the generator and spend your first 100 credits learning which prompts your aesthetic prefers. That is the part nobody can write for you.
Open GPT Image 2 and create your first image →
That is the full playbook on how to use GPT Image 2 — from your first sign-in through a confident iteration loop across both modes. Bookmark the quick reference, run a batch of ten images tonight, and you will already be producing work that would have taken another tool half a day to match.
If you want to go deeper:
- What Is GPT Image 2? Features, Pricing and Use Cases
- GPT Image 2 Prompt Guide: Write Prompts That Work
- GPT Image 2 vs Sora: Image Generation Compared
- Try the built-in Image Prompt Generator to draft a prompt from a short idea.
- Jump directly to Text to Image or Image to Image if you prefer the focused single-mode pages.
Published by the GPT Image 2 Team. As of April 2026, pricing is a flat 12 credits per generation across both modes. If that ever changes, we'll update this article and leave a note in the change log.
